What's in the case
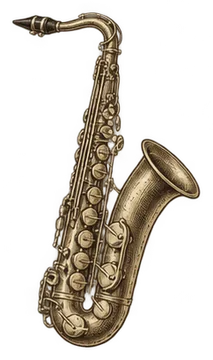
A student alto or tenor saxophone comes out of the case in a few pieces: the body, the neck, the mouthpiece, and a reed held on by a ligature. A neck strap carries the weight while you play.
| Part | What to know |
|---|---|
| Body | The big curved tube with most of the keys. A ring on the back is where the neck strap hooks on [1][3]. |
| Neck | The short bent tube between the body and the mouthpiece. It carries part of the octave key mechanism, and the end that goes into the body is called the tenon [1]. |
| Neck screw | A thumb screw on the body where the neck goes in. It holds the neck in line so the octave key works [7]. |
| Mouthpiece | Slides onto the cork at the thin end of the neck [1][6]. |
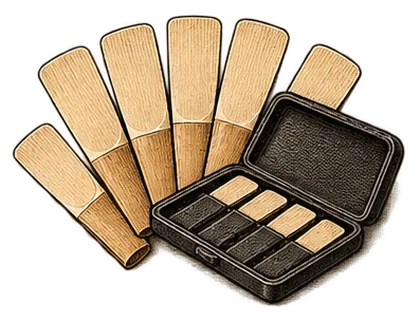
| Reed and ligature | The reed vibrates against the mouthpiece. The ligature is the clamp that holds it there [1]. |
| Neck strap | Takes the weight off your thumbs. The saxophone is awkward to hold up without one [3]. |
The delicate spot is the octave key mechanism where the neck meets the body [1][7]. Almost every step below is about keeping your hands, and the neck, clear of it.
Before you start
Set the case flat with the right side up before you open the latches. If the lid has no logo, D'Addario suggests a sticker so you always know which way is up [1].
Wet the reed first so it soaks while you work. Hold it in your mouth or stand it in a little water for about a minute [1][3]. A dry reed doesn't vibrate as well [1].
Look at the neck cork. If the mouthpiece was hard to push on last time, rub a small amount of cork grease into the cork [1][3]. Sweetwater suggests greasing it about every two weeks so it doesn't dry out and crumble [3]. Selmer's advice is to grease it often enough that the mouthpiece goes on without force [6].
Putting it together
D'Addario and Selmer both start with the mouthpiece and reed on the neck, before the neck goes anywhere near the body [1][6]. Working on the small piece first means you aren't twisting a mouthpiece onto a neck that's already locked into the instrument.
- Mouthpiece onto the neck. Hold the neck by its lower end, the tenon, and keep your fingers off the octave mechanism on top [1]. Sweetwater puts it as holding the curved part, never the mouthpiece end, because the thin end bends [3]. Twist the mouthpiece onto the cork with a gentle back-and-forth turn [1]. Don't push it all the way on yet; you'll set its exact spot when you tune [6][8].
- Ligature on, then the reed. Loosen the ligature and set it on the mouthpiece. D'Addario's sheet shows the screws facing right [1]. Lift it slightly and slide the reed underneath, flat side against the mouthpiece [1]. Putting the ligature on first makes it easier to guide the reed into the center [5].
- Line up the reed. The tip of the reed should be even with the tip of the mouthpiece and sit straight, not crooked [1][5]. A thin sliver of the black mouthpiece tip showing above the reed is fine [2]. The ligature goes on the smooth, uncut part of the reed, below the shaved area called the vamp [2].
- Tighten the ligature. Turn the screws until the reed can't slide, and stop there. Overtightening can damage the reed [3].
- Put on the neck strap. Set the neck and mouthpiece down somewhere safe, then put the strap around your neck [1].
- Lift the body. Pick it up by the bell [3], carefully so you don't bend any keys [1], and clip the strap hook into the ring on the back [1][3].
- Loosen the neck screw a little [3].
- Neck into the body. Holding the body with one hand, ease the neck into the receiver with a slight twist [3][6]. Keep the neck's octave mechanism clear as it goes in. The rounded part at the bottom of the neck's octave key should end up hovering just above the octave key lever on the body [1]. Push it in until it's fully seated [6].
- Line it up and tighten the screw. Turn the neck so the mouthpiece points toward you, check that the octave parts line up [6], then tighten the neck screw. Yamaha says a few turns until you feel comfortable resistance, and no tighter [7].
- Adjust the strap. Raise or lower it until the mouthpiece reaches your mouth without tipping your head up or down [2]. D'Addario recommends a strap that doesn't stretch, so the saxophone doesn't sag lower as you play [2].
On a tenor or baritone, everything is the same, just heavier. Get the strap on before you lift the body, and never pick up the instrument by the neck [6].
Tuning with the mouthpiece
Where the mouthpiece sits on the cork sets the pitch of the whole instrument. Pushing it farther on makes the saxophone shorter and the pitch higher. Pulling it out makes it longer and the pitch lower [8]. Move it in small turns, keep the reed lined up underneath, and check again with a tuner. The tuning guide explains how to read the needle.
Short notes, the ones with most keys open, move more than long notes when you shift the mouthpiece [8]. Music Medic's method is to play a C scale on a warmed-up saxophone and move the mouthpiece until the long and short notes balance [8]. Moving the mouthpiece won't change how one octave lines up with the other [8].
Worked example: setup and first notes on alto sax
Here's a first practice session from opening the case to playing a song.
- Put the reed in your mouth or a cup of water. It needs about a minute [1][3].
- While it soaks, check the cork. If it feels dry, spread a little cork grease on it [1][3].
- Twist the mouthpiece onto the cork, not all the way, holding the neck by its lower end [1][6].
- Slip the ligature on loosely, slide the reed under it, line the tip up with the mouthpiece tip, and tighten the screws until the reed stops moving [1][3].
- Strap on, body up by the bell, strap hooked [1][3].
- Neck screw loose, neck in with a slight twist, octave parts lined up, screw snug [1][3][7].
- Play middle A. Then press and release the octave key under your left thumb while the A is still sounding. The pitch should jump up an octave and drop back cleanly [2].
If the jump doesn't happen, check two things. First the neck: the octave mechanisms have to line up, which is the whole reason the neck screw exists [1][7]. Then your mouth: D'Addario links an octave that won't change to a loose embouchure or taking in too much mouthpiece [2].
Once the A works, play Hot Cross Buns. On alto it uses only three notes, B, A and G, and the alto sax chart has a card for each one. If the notes come out thin, fuzzy or squeaky, the reed position is the first place to look (below), then the squeaks guide.
When the reed doesn't feel right
Small changes in reed position make a big difference.
- Reed set too low (below the mouthpiece tip): it can cave in against the mouthpiece. The sound turns thin and bright, or stops [5].
- Reed set too high (past the tip): it feels harder than it is, tires you out faster, and the tone gets fuzzy and quieter [5].
- Feels too easy: slide it up a hair. Feels too hard or buzzy: slide it down a hair [2].
If moving it doesn't help, the reed may be worn out or simply the wrong strength. Old reeds can feel softer than the number on the box [2]. The reed strength guide covers how to choose.
Taking it apart
Work in reverse, from the top down.
- Loosen the neck screw and lift the neck out with the same slight twist, holding it by the lower end [3][6].
- Loosen the ligature and take the reed off. Store it flat in a reed guard, not on the mouthpiece, so it dries without warping [2].
- Twist off the mouthpiece. Swab it, being careful of the tip [4]. Every so often wash it in lukewarm water with a little mild dish soap [2].
- Dry the inside of the neck with a small swab [4].
- Swab the body. On soprano, alto and tenor the swab goes in through the bell and comes out at the neck opening. Baritone swabs go in at the neck opening [4].
- If any pads look wet, slip a piece of cleaning paper between the pad and the tone hole and press the key lightly a few times. Don't pull the paper out while the key is still pressed [4].
- Put each piece back in its place in the case and close it.
Yamaha points out that the small octave key tone hole clogs easily and can be cleared with a tone hole cleaner, gently, so the metal tip doesn't scratch it [4]. For a fuller cleaning routine, including what to do weekly, see the woodwind cleaning guide.
Common mistakes
- Picking the saxophone up by the neck. Selmer's instructions say never to do it [6].
- Holding the neck by the mouthpiece end. Hold the curved part or the tenon [3][1].
- Pushing the neck in with the screw still tight. Loosen it first [3].
- Catching the octave mechanism. The neck's octave key should hover over the body's lever, not get jammed against it [1].
- Cranking the neck screw. Yamaha warns it can distort the receiver so it doesn't seal, or break the screw [7].
- Overtightening the ligature. It can damage the reed [3].
- Leaving the reed on the mouthpiece. Store it in a reed guard [2].
- Eating right before you play. Crumbs collect in the mouthpiece and choke the sound [3].
- Letting the bell rest on the chair while you play. Sweetwater says to keep the bottom of the saxophone off the chair [3].
If the neck still wiggles in the body with the screw snug, don't keep tightening it. Yamaha says that means the tenon needs to be refitted by a repair technician [7].
Sources
- Saxophone Assembly (PDF), D'Addario Woodwinds
- Saxophone Survival Guide, D'Addario Woodwinds
- Saxophone Quickstart Guide, Sweetwater
- Care and Maintenance of a Saxophone: After Playing, Yamaha
- Correct Reed Placement and Ligature Positioning, Yamaha Music
- How to Assemble Your Saxophone, Henri Selmer Paris
- A Guide to Adjusting Saxophone Neck Screws, Yamaha Music
- Mouthpiece Placement: How It Works, Music Medic