The five parts
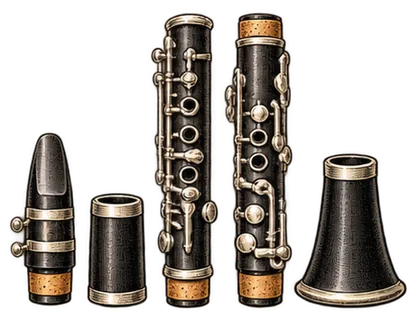
A B♭ clarinet comes apart into five pieces. From the top they are the mouthpiece, barrel, upper joint, lower joint and bell [1][2].
| Part | What to know |
|---|---|
| Mouthpiece | Usually hard rubber. The reed sits on its underside, against your lower lip [3]. |
| Barrel | Joins the mouthpiece to the upper joint. Pulling it out a little lowers the pitch [3][4]. |
| Upper joint | Keys and rings worked mostly by the left hand [3]. |
| Lower joint | Worked mostly by the right hand [3]. |
| Bell | The flared end. It evens out the tone of the lowest notes in each register [3]. |
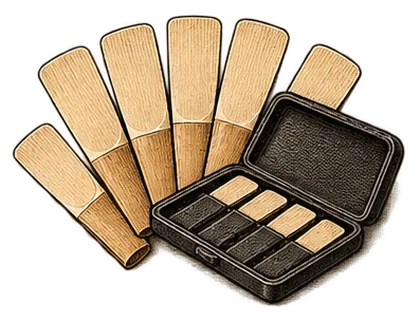
The reed and the ligature, the clamp that holds the reed in place, go on the mouthpiece [3]. When you aren't playing, a cap goes over the mouthpiece to protect it and the reed [4].
Two more terms come up again and again. A tenon is a cork-covered end that fits into the next piece [5][6]. The bridge key is a lever in two halves, one on each joint, and the halves meet when the clarinet is together [7]. It bends easily [2], and the pads on the lower joint can only seal when the two halves line up [6].
Before you open the case
Sit down and set the case flat on a table or the floor with the logo on top [2]. If your case is plain, D'Addario suggests putting a sticker on the lid so you always know which side is up [7].
Wet the reed first so it soaks while you work. Hold the thin end in your mouth, or stand it in a little water, for 30 to 60 seconds [7]. Don't chew on it [2].
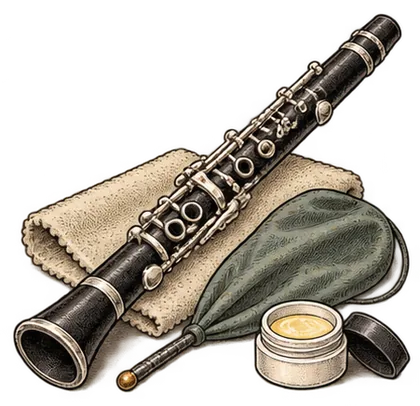
Then check the corks. If they look dry, or a joint was stiff last time, rub a small amount of cork grease onto each tenon cork and spread it with a finger [7]. D'Addario's assembly sheet says most clarinets need grease every two or three days [7]. Yamaha asks for a thin coat and warns against using too much [1]. Wash your hands afterward [8] so the grease doesn't end up on the keys.
Putting it together
Build from the bottom up: bell, lower joint, upper joint, barrel, mouthpiece [7][8]. Each piece goes on with a gentle back-and-forth twist, never a straight push [7][2]. Hold the body of each piece, not the keys. They're thin metal and bend easily [7].
- Bell onto the lower joint. Hold the lower joint with your hand around the rings and off the long rods that run down the side [8][2]. Twist the bell on until it's fully seated [2].
- Upper joint onto the lower joint. Hold the upper joint in your left hand and press down the rings, the metal circles around the tone holes. That raises the upper half of the bridge key so it can't hit the lower half [7][8][2]. Keep the rings down while you twist the joints together in small movements, holding the lower joint near the bell with your right hand [2]. Then line up the two halves of the bridge key, and the tone holes along with them [7][8].
- Barrel onto the upper joint. The large end of the barrel goes on [8].
- Mouthpiece into the barrel. Take off the cap and ligature first [8]. Twist the mouthpiece in and turn it so its flat side, where the reed goes, lines up with the register key on the back of the clarinet [8][2]. That's the key your left thumb works [6].
Yamaha's manual uses a different order: barrel onto the upper joint, bell onto the lower joint, then the two halves together with the rings pressed [1]. Either order protects the bridge key, as long as the rings are down when the joints meet.
Reed and ligature
Slip the ligature loosely onto the mouthpiece first. Then slide the thick end of the reed under it, flat side against the mouthpiece [7][8]. With the ligature already in place, it's easier to guide the reed into the center [9].
Where the tip goes. Line the reed tip up even with the mouthpiece tip, or a hair below it so a thin strip of black shows [9][7][1]. It should never stick out past the mouthpiece [8]. A reed set too low can cave in, giving a thin, bright sound or none at all. Set too high, it feels harder than it really is and the tone turns fuzzy [9]. Center it side to side as well [7]. If a well-placed reed still feels too hard or too soft, the problem is probably the strength, which is covered in choosing reed strength.
Where the ligature goes. Its top edge sits just below the end of the reed's shaved section (the vamp), on the smooth part of the reed [7][10]. If your mouthpiece has a line marked on it, that means just below the line [7].
How tight. Turn the screws until the reed can't slide, but stop before they're hard to undo [2]. Overtightening can strip the ligature or break a screw [5]. You want firm contact without crushing the reed [9].
Taking it apart
Reverse the order, working from the top down [11][8].
- Loosen the ligature and lift the reed off without chipping the tip [11]. Put it in a reed guard so it dries properly [8]. Don't store it on the mouthpiece, where it can grow mold [5][10].
- Twist off the mouthpiece, put the ligature back on it and cap it [11].
- Swab the clarinet (below).
- Twist off the barrel.
- Press the left-hand rings again and twist the upper joint off the lower joint, the reverse of how it went on [8][11].
- Twist off the bell.
Swab while it's still in one piece. With the mouthpiece off, drop the swab's weight into the bell, turn the clarinet over and pull the swab out through the barrel [11]. Buffet recommends that direction because a swab pulled the other way can snag on a tube inside the upper joint [4]. If it catches, pull slowly and don't force it [12]. Repeat until it comes out dry [11]. The mouthpiece gets a small swab from the cork end, with care around the tip [12].
Once the joints are apart, wipe each tenon dry. Moisture collects at the joints, and on a wooden clarinet it can cause cracks [12]. Wipe off any extra cork grease too, or dust will stick to it [12].
Each piece goes back in its own slot. Keep only the clarinet and its accessories in the case, because a folder or music on top can bend keys [8][5]. A wet swab stays out [4]. The full end-of-practice routine, including pads and washing the mouthpiece, is in cleaning a clarinet, flute and saxophone.
Bass clarinet differences
The bass follows the same plan with heavier parts. Its neck and bell are metal, and a floor peg or neck strap carries the weight instead of your right thumb [3][6][13].
- Body. It may be one piece or two joints [6]. On a two-piece body, press the ring key on the upper joint to lift the bridge key, as on B♭ clarinet [6][13]. Yamaha's manual says to line up the bridge keys and slide the joints straight together without twisting [1], while Sweetwater and Alfred describe twisting them together [6][13]. Check the manual for your model.
- Bell. The bell has its own key. Hold its pad down while you fit the bell on, then line the keys up [1][13]. Buffet gives the same instruction for its basses that go down to low E♭, so the keys don't collide [4].
- Floor peg. Put it in its bracket, snug the set screw, and adjust the height so the mouthpiece reaches your mouth [6].
- Neck and mouthpiece. With the bass resting on your lap, twist the neck in and tighten the neck screw [13]. The mouthpiece goes onto the neck with its flat side facing down [13][6].
- Swab. It takes a larger swab [12], and Alfred's bass book starts the swab from the neck end [13].
Fingerings for the whole range are on the bass clarinet chart.
Worked example: a first assembly, timed
Plan on about five minutes the first time. This is how those minutes break down.
0:00 to 0:30. Case flat on the floor, logo up [2]. Open it. Put the thin end of the reed in your mouth [8].
0:30 to 1:15. Look at each cork. If one looks dry, add a small dab of grease and spread it with a fingertip [7]. Wash or wipe your hands [8].
1:15 to 2:00. Pick up the lower joint with your right hand around the rings, away from the rods. Twist the bell on [8][2].
2:00 to 3:00. Upper joint in your left hand, rings pressed down. Twist it onto the lower joint in small movements, then line up the bridge key halves [7][2]. This is the step where keys get bent, so give it the full minute.
3:00 to 3:30. Twist the barrel on [8].
3:30 to 4:00. Mouthpiece in, flat side lined up with the register key [8].
4:00 to 4:45. Ligature on loosely. Reed under it, centered, with the tip even with the mouthpiece tip or a hair below [7][9]. Ligature just below the vamp, screws snug [10][2].
4:45 to 5:15. Test it. Play open G (written G4, no fingers down). Then play low G an octave below it (written G3, with the thumb hole and all six finger holes covered); the clarinet fingering chart shows both. If open G sounds but low G squeaks or won't start, check the bridge key first, since the lower pads depend on it [6]. If both squeak, recheck the reed, then work through clarinet and saxophone squeaks.
By the end of the first month, aim for two minutes without skipping the ring press.
Common mistakes
- Pushing instead of twisting. Use small back-and-forth turns [7][2].
- Joining the joints without pressing the rings. The bridge key halves knock together [7].
- Squeezing the rods. Hold the body [8].
- Forcing a tight joint. Grease the cork instead. Buffet warns that force can crack a clarinet [4].
- Too much grease. A thin coat is plenty [1], and the extra collects dust [12].
- Reed past the mouthpiece tip. It plays hard and fuzzy [9].
- Cranking the ligature. It can strip the ligature or break a screw [5].
- Reed left on the mouthpiece. It can grow mold [5].
- Music in the case. It presses on the keys [8].
A tenon cork that's flaking or loose needs replacing, or a joint can slip apart while you're holding the clarinet [12][14]. That's a job for a music store [12]. Yamaha's rule of thumb is new corks every year or two, depending on how much you play and how the clarinet is stored [14].
Sources
- Clarinet Owner's Manual, Yamaha
- Assembling Your Clarinet, Blow Woodwind and Brass
- Clarinet, Wikipedia
- Maintain Your Instrument, Buffet Crampon
- Instrument Maintenance, FIU Bands
- Bass Clarinet Quickstart Guide, Sweetwater
- Clarinet Assembly (PDF), D'Addario Woodwinds
- Sound Innovations for Concert Band, Book 1, Second Edition: B♭ Clarinet (sample pages), Alfred Music
- Correct Reed Placement and Ligature Positioning, Yamaha Music
- Clarinet Survival Guide, D'Addario Woodwinds
- How to Disassemble Your Clarinet, Sage Music
- Care and Maintenance of a Clarinet: After Playing, Yamaha
- Sound Innovations for Concert Band, Book 1, Second Edition: B♭ Bass Clarinet (sample pages), Alfred Music
- Care and Maintenance of a Clarinet: Seasonal Care, Yamaha