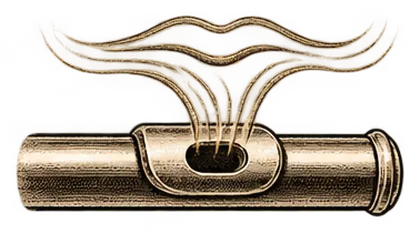
The flute is the one band instrument where nothing touches the inside of your mouth. There is no reed and no cup to buzz into. You blow a narrow stream of air at the far edge of a hole, and the sound starts when that stream splits, part of it going into the tube and part going over the top [7]. Every first-lesson problem on flute comes back to aiming that stream.
Start with the headjoint only
Take the headjoint off and leave the body in the case. Many teachers have beginners play only the headjoint for the first lesson or two [1][2][8]. Holding the full flute tires the arms and shoulders quickly, and the balancing act pulls attention away from the mouth, which is where the sound is made [2].
Hold the headjoint in your left hand near the lip plate. Your right hand is free to cover the open end, which comes in handy below.
Where the lip plate goes
The lip plate rests against your chin just below the flare of the lower lip, the spot where the red of the lip starts to curve outward [1]. Run it up and down a little and you will feel the edge of the embouchure hole under the lip. That edge is your landmark [1].
The lower lip should cover about a third of the hole [3][7]. Some teachers say a quarter to a third [8]. Players with fuller lips can sit the plate slightly higher, directly on the lip [1].
Some method books teach you to put the hole right on your lips, as if kissing it, then roll the headjoint outward until the hole faces up [10]. Several flute teachers writing for band directors say this habit puts the plate too high for most players [1][4]. If you learned the roll-out method and get no sound, try starting with the plate lower on the chin instead.
Aperture: the size and shape of the opening
The aperture is the small gap in the middle of your lips where the air comes out. Keep the lips relaxed and a little moist, and let the air itself open the gap rather than forcing a shape [3].
Two shapes cause trouble. A puckered, round opening gives a breathy sound. Drawing the corners of the mouth slightly back and down stretches the opening into a flatter oval, which focuses the tone [4]. One flute book compares the size of the opening to the end of a drinking straw [10].
A good check is the condensation mark. After a few tries, look at the lip plate. A small, neat triangle of fog on the far side of the hole means the air is landing in roughly the right place [10].
Air direction and angle
Aim the air across the hole toward the far edge, not straight down into it [3]. In theory the edge splits the stream half and half, but one teacher suggests sending as much as sixty percent down into the hole for a fuller sound [4].
Air speed matters more than air amount. A useful image is the speed of air that blows out birthday candles [1]. Faster air raises the pitch and slower air lowers it [6].
Your lower lip steers the angle. Pushing the lower lip forward, as if saying "pooh," raises the air angle and sends more air across the hole [1][4]. Angling the air lower drops the pitch, and angling it higher raises it [1].
To start each sound, use the tongue. Move it as if saying "too" while you blow, which gives a clearer start than "foo" with no tongue [6].
Rolling in and out
Rolling means turning the headjoint toward you (in) or away from you (out). It changes how much of the hole your lip covers.
- Rolled in too far: the tone gets small and weak [4], and if you cover too much of the hole the sound is flat and muffled [1].
- Rolled out too far: the tone turns open and fuzzy, you run out of breath quickly, and the pitch runs sharp [4]. Covering too little of the hole gives a sharp, bright, unfocused sound [1].
Use rolling to find the sound on day one. After that, teachers prefer that you set the roll once and adjust pitch with your jaw and lower lip, because rolling changes tone quality too [1]. As a rule of thumb, a flat note wants the flute rolled slightly out or the air aimed higher, and a sharp note wants it rolled slightly in or the air aimed lower [5].
The headjoint pitch test
With the open end of the headjoint uncovered, you get a fairly high, thin note. Cover the open end with the palm of your right hand and the pitch drops [3][7]. The covered version is easier for many beginners because it speaks with slower air [7]. Roll and adjust until the covered tone sounds close to A, the second space of the treble staff (A4) [4]. That is a sign your setup will work on the whole flute.
First notes on the whole flute: B, A and G
Put the flute together with the headjoint pulled out about a quarter inch from the body, which improves overall tuning on most student flutes [1][9]. Hold the flute about a hand's width below parallel to the floor [3].
Many teachers start beginners on B, A and G in the staff (B4, A4, G4) [9]. All three are left-hand notes, with the right pinky resting on the E♭ key and the other right fingers up [11].
| Note | Left thumb | Left hand fingers down | Right hand |
|---|---|---|---|
| B4 (middle line) | B thumb key | 1 (index) | Pinky on E♭ key |
| A4 (second space) | Thumb key | 1 and 2 | Pinky on E♭ key |
| G4 (second line) | Thumb key | 1, 2 and 3 | Pinky on E♭ key |
Going from B to A to G adds one finger at a time, so the only new thing is the finger. Keep the lip plate in exactly the same spot when the body goes on; adding the body should not change where the flute sits on your lip [3]. The goal for these three notes is clean fingers, a tongued start on each note and fast air [9].
The full first-octave layout is on the flute fingering chart. Piccolo uses the same basic fingerings [11], so the piccolo chart will look familiar later.
Worked example: a 10-minute first session
Set a timer and use a mirror.
- Minutes 0 to 1. Without the flute, blow a thin stream at your palm. Pass the edge of a sheet of paper through it to find where the stream is strongest [3]. Rest.
- Minutes 1 to 3. Headjoint only, open end covered with your right palm. Place the plate below the lip flare, cover about a third of the hole, and blow a soft "pooh." Roll in and out slowly until you hear a tone near A4 [4]. Stop and breathe normally between tries.
- Minutes 3 to 4. Same setup, open end uncovered. You need faster air for the higher note. Tongue four short "too" notes [6].
- Minutes 4 to 5. Rest. Check the fog triangle on the lip plate [10].
- Minutes 5 to 6. Assemble the flute, headjoint pulled out about ¼ inch [1]. Hold it without playing and practice the B, A and G fingerings with the headjoint resting on your left shoulder [9].
- Minutes 6 to 8. Play B4. Hold it for four slow counts, rest four counts. Then A4, then G4. Same lip spot for all three.
- Minutes 8 to 10. Play B–A–G and G–A–B, one note per slow beat, tonguing each note. If a note fails, go back to the headjoint for 30 seconds and return.
If you got only a few clear notes, that is a normal day one. Some students sound on the first day and others need days, weeks or even a month to find a consistent spot [2].
Why there is no sound, or only air
- Air going into the hole instead of across it. Aim at the far edge [3].
- Too much hole covered. Roll out a little or lower the plate slightly [1][4].
- Round, puckered lips. Draw the corners back and slightly down [4].
- Aperture too wide. A wide stream gives the usual airy sound; tonguing forward with a small opening helps focus it [1].
- Big corrections. Tiny embouchure changes make a big difference. Make one small adjustment, listen, then make another [2].
- Off center. Slide the hole a little left or right toward where the air stream is strongest [10].
Dizziness and breathing
Feeling lightheaded is common in the first sessions because you are pushing out a lot of air quickly. When it happens, put the flute down and breathe normally for a few minutes. It fades as your air control improves [2]. Keep early sessions short for this reason.
Take a full, relaxed breath before each note, and keep your lip shape the same while you breathe out [6]. Stand or sit tall: bending or twisting at the waist disrupts the airflow and pulls the pitch flat [1]. A long-term target that one university flute studio sets for graduating high school students is a 20-second long tone in one breath [5], so a few seconds per note is fine for now.
Common mistakes
- Lip plate too high. The kiss-and-roll habit often lands the plate on the lip instead of under it [1][4].
- Blowing harder to fix a bad note. More force does not find the edge. Faster, narrower air does, and blowing harder on high notes makes them sharp and shrill [1].
- Changing placement when the body goes on. Keep the same lip spot you found on the headjoint [3].
- Smiling. A wide smile spreads the lips; keep the corners down [4].
- Headjoint pushed all the way in. Many students leave it in, which makes the high register very sharp [1]. Mark the ¼-inch spot with a fine permanent marker [1].
- Right thumb too far forward. Many beginners creep it toward the end of the flute. A small masking-tape marker on the body helps it find the same spot each time [9].
Expect the jump to second-octave notes to take a week or two of steady work, since it needs a smaller opening and a higher air angle [9]. Once B, A and G come out reliably, add C and then E and F, which is the order one experienced teacher uses [9], and try short tunes from the flute songs page that stay on those notes.
Sources
- 10 Flute Tips for Band Directors, The Instrumentalist
- Tips to Help You Learn to Make a Sound on the Flute, Sage Music
- Flute Embouchure (Edwin Kruth), BANDWORLD Magazine
- The Flute Embouchure (Bradley Garner), BANDWORLD Magazine
- Flute Fundamentals (Leonard Garrison), University of Idaho
- How to Play the Flute, Yamaha Musical Instrument Guide
- Playing on the headjoint, Yamaha Flute Assist Attachment manual
- Ten Things Every Band Director Should Know About Flutes, BANDWORLD Magazine
- First Lessons for the Beginning Flutist, Part 2, The Instrumentalist
- Flute/Embouchure and Producing Sound, Wikibooks
- Basic Fingering Chart, First Octave (flute and piccolo), The Woodwind Fingering Guide