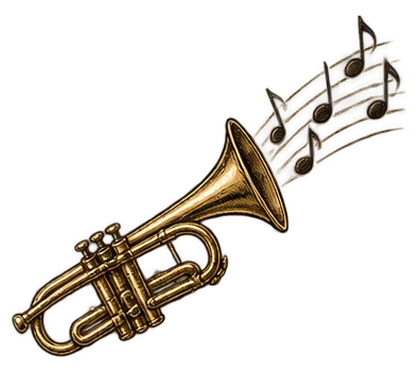
Three valves give a trumpet only seven tube lengths [1]. Everything else comes from your face and your air. The high notes on the trumpet fingering chart use the same fingerings as notes an octave or more lower, so getting higher is mostly a matter of learning to move up the stack of notes each fingering already holds.
All notes in this guide are written pitch for B♭ trumpet, which sounds a whole step lower than written [1]. Middle C is C4.
Partials: one fingering, many notes
Every valve combination is a tube of a certain length, and every tube plays a series of notes called partials or harmonics. You move between them by changing the lip aperture and tension [1]. Higher notes need the lips to vibrate faster [2].
With no valves pressed, the series runs written C4, G4, C5, E5 [3], and above that G5, B♭5 and C6 [4]. The jumps get smaller as you go up: a fifth, a fourth, a major third, a minor third. That is why the upper register feels crowded. The notes are close together and it is easy to land on the wrong one.
Pressing valves lowers the whole series. Valve 2 lowers it a half step, valve 1 a whole step, and valve 3 a step and a half [1]. Valve 2 alone gives B3, F♯4, B4, D♯5 [3], and the same pattern repeats a half step lower for each longer combination.
| Valves | 2nd partial | 3rd | 4th | 5th | 6th |
|---|---|---|---|---|---|
| 0 | C4 | G4 | C5 | E5 | G5 |
| 2 | B3 | F♯4 | B4 | D♯5 | F♯5 |
| 1 | B♭3 | F4 | B♭4 | D5 | F5 |
| 1-2 | A3 | E4 | A4 | C♯5 | E5 |
| 2-3 | A♭3 | E♭4 | A♭4 | C5 | E♭5 |
| 1-3 | G3 | D4 | G4 | B4 | D5 |
| 1-2-3 | F♯3 | C♯4 | F♯4 | A♯4 | C♯5 |
Two notes on this table deserve a warning. The 5th partial is naturally about 14 cents flat, and the 7th partial (B♭5 open) is about 31 cents flat [4]. Fingerings that land on that 7th partial are generally avoided because they are too flat [1].
The low end of the standard range is written F♯3, with all three valves down [5]. Most fingering charts stop at C6, two octaves above middle C [1], and that is also the note professional classical players can rely on [5].
Air speed and aperture
Teachers describe the high register in different words, and it helps to know where they agree.
One common description is that range comes from fast air through a small aperture [6]. In that view a low note needs a big opening between the lips, and the lips have to form a smaller opening for high notes and be strong enough to resist the air [6]. The same writer points out that if you keep the aperture the same and add air, the note jumps to the next partial, while if the aperture grows, you only get louder [6].
A different school says the note changes because of tension in the lip muscles inside the mouthpiece, and that the aperture should stay near its resting size in every register [7]. In that view, more air mostly means more volume [7].
Where they agree: blowing harder is not how you go higher. Speed and small, controlled changes at the lips matter far more than quantity. One lead player puts it plainly: high notes take a small amount of air, moving fast [8].
Tongue position and vowel shapes
The tongue shapes the space the air passes through. Saying "ee" arches the tongue and speeds up the air; saying "ah" lowers it and adds air volume [8]. Many teachers have students move from "ah" or "oh" on low notes toward "ee" on higher notes in a smooth glide during lip slurs [9]. The arch works a bit like putting your thumb over the end of a garden hose [9].
Do not overdo it. If the "ee" pinches the sound thin, back off toward "ih" or "eh." Some teachers prefer a rounder "euoo" shape for certain exercises [10].
Mouthpiece pressure
You need some pressure. The right amount is just enough to keep a seal [7]. Yamaha's beginner guide says plainly not to press the mouthpiece firmly against the lips [2].
Excess pressure is the most common shortcut students take to high notes, along with tension and too little air support [10]. Experienced players are especially careful to keep pressure low early in the day [11].
A simple check: play a comfortable G4, then C5, and watch in a mirror. If the red ring on your lip deepens noticeably on the higher note, you are pushing.
Lip slurs: the core range exercise
A lip slur keeps the fingering the same and moves between partials without tonguing. It trains exactly the motion high notes need. One effective pattern is to slur from low C up to G and back, then repeat on every valve combination going down chromatically [9]. When the slur bumps or cracks, the air stopped; slow down instead of forcing it [9]. Lean into the bottom note and let the air carry you up, rather than reaching for the top note [9].
Keep it short. A session of 10 to 15 minutes at a slow tempo is plenty [9]. Too many lip slurs can wear out a non-professional player for the rest of the day [11].
Endurance and rest
Rest as much as you play [12]. A practical version: slur for about 30 seconds, rest about 30 seconds [9]. Do not work the upper register hard every day; like any training, the muscles need recovery between sessions [12]. After a long, heavy stretch of playing, a full day off lets the lips recover [11].
Short daily sessions beat long gaps. Twenty to thirty minutes every day is better than an hour every other day [11].
Worked example: a two-week lip slur progression
Do this after a normal warm-up of long tones. Play each slur slurred, slowly (around quarter note = 60), with a breath and a rest between patterns. Stop for the day if the sound gets thin or you need more pressure to keep going.
Days 1 to 3. Two notes, 2nd to 3rd partial. Slur up and back down on each fingering:
- Open: C4–G4–C4
- Valve 2: B3–F♯4–B3
- Valve 1: B♭3–F4–B♭3
- Valves 1-2: A3–E4–A3
- Valves 2-3: A♭3–E♭4–A♭3
- Valves 1-3: G3–D4–G3
- Valves 1-2-3: F♯3–C♯4–F♯3
Days 4 to 7. Three notes, up to the 4th partial. Same seven fingerings, adding the next note up: open C4–G4–C5–G4–C4, then valve 2 B3–F♯4–B4–F♯4–B3, and so on down to 1-2-3 F♯3–C♯4–F♯4–C♯4–F♯3. Change the vowel from "ah" on the bottom note toward "ee" on the top [9].
Day 8. Light day. Only the days 1 to 3 pattern, once through.
Days 9 to 11. Add the 5th partial on the first three fingerings only. Open C4–G4–C5–E5, valve 2 B3–F♯4–B4–D♯5, valve 1 B♭3–F4–B♭4–D5, each back down the same way. Remember the top notes are 5th partials and sit a little flat [4], so keep the air moving through them. Keep the four longer fingerings at three notes.
Days 12 to 14. All seven fingerings to the 5th partial. 1-2 A3–E4–A4–C♯5, 2-3 A♭3–E♭4–A♭4–C5, 1-3 G3–D4–G4–B4, 1-2-3 F♯3–C♯4–F♯4–A♯4. On day 14 only, try one open slur to G5 (C5–E5–G5–E5–C5). If it speaks at a medium volume with no extra pressure, it goes into the routine next week. If not, it waits.
Every day: 30 seconds of slurring, 30 seconds of rest [9], 10 to 15 minutes total [9]. Skip the top-note attempts on any day your lips feel tired from rehearsal [12].
Realistic timelines
Range grows slowly and unevenly. In middle school band, music at Grades 1 and 2 generally tops out at written G5, and A5 and above usually do not show up until Grade 2½ to 3 [12]. Being able to hit one G5 is not the same as playing a dozen of them in tune in one piece; endurance takes longer than the first note [12].
Focused exercise does show results. One clinician reports clearly easier upper registers, better tone and better endurance after a few weeks of concentrated lip bend work [10]. Plan for half steps over weeks, not octaves over days.
Common mistakes
- Pressing harder. Extra pressure, tension and weak air support are the classic high-register habits [10].
- Pinching the lips shut. Clamping restricts airflow and makes high notes harder [8]. Clamping instead of keeping the aperture steady is a common error [7].
- Playing loud to get high. Overblowing gives a strained, unfocused sound [8]. Practice high slurs at a medium volume.
- Smiling. Spreading the corners weakens the muscles that support the aperture [7].
- Puffing the cheeks. Check in a mirror and keep them in [8].
- Skipping rest. Recovery is part of the exercise [9][12].
- Reaching for the top note. Focus on the bottom note and let the air carry the slur up [9].
Use the trumpet scale pages to test the result: a one-octave C major scale from C4 to C5 is the first check, and adding D5 and E5 on top is the next step once the week 2 slurs are steady. If you also play mellophone, look up the fingerings for these slurs on the mellophone chart before trying the plan there.
Sources
- Trumpet, Wikipedia
- How to Play the Trumpet, Yamaha Musical Instrument Guide
- Trumpet Knowledge, Open Music Academy
- Harmonic series (music), Wikipedia
- Trumpets: A Primer, Boulder Brass
- Air: The Real Trumpet Octave Key, BBTrumpet
- How to Play High Notes on the Trumpet, tonebase
- How to Play High Notes on the Trumpet, TrumpetStudio
- Mastering Flexibility (Without Blowing Out Your Chops), Trumpet Practice Notes
- The Dallas Brass: A Healthy Upper Register on the Trumpet, MakeMusic
- Care and Feeding of Your Lip and Skills When Time Is Limited (Floyd E. Friedli), International Trumpet Guild
- Developing the Middle School Lead Trumpet Player, SmartMusic (via Harvard TagTeam)