Before the first note
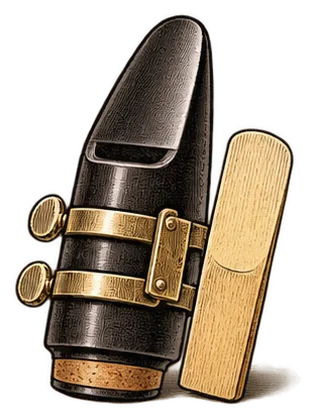
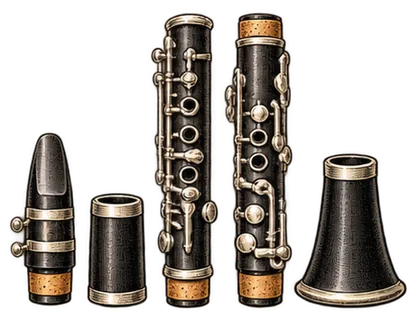
Put the clarinet together and set the reed first. The clarinet assembly guide covers cork grease, where the reed goes and how tight the ligature should be. A beginner reed should feel easy to blow. Yamaha's educator site says most students should start on a strength 2.5 [4], and if a reed feels too hard or sounds fuzzy, D'Addario suggests trying a softer one [3]. The reed strength guide explains the numbers.
D'Addario also suggests brushing your teeth or rinsing with water before you play, and skipping sugary drinks right before [3].
Step 1: Form the embouchure
The embouchure is the way your mouth holds the mouthpiece. Yamaha's version has four steps [1]:
- Gently roll your bottom lip over your bottom teeth.
- Rest the reed on that bottom lip.
- Set your top teeth firmly on top of the mouthpiece.
- Close your mouth around it, as if you were smiling.
Sweetwater adds two points. Close your lips all the way around the mouthpiece so no air leaks out, and don't bite down: think of shaping your lips as if saying the letter Q [2]. Your teeth go on the mouthpiece, never on the reed [2].
Blow straight ahead and keep your cheeks flat [1].
Step 2: Get the right amount of mouthpiece
Yamaha singles out two things that matter most at the start: how much mouthpiece is in your mouth and the angle you hold the clarinet [1]. With too little mouthpiece it's hard to get any sound at all. With too much, the sound gets distorted [1].
- Starting point. Sweetwater suggests about 1/4 inch of mouthpiece in the mouth, with the reed resting on your lower lip [2].
- The paper test. D'Addario says beginners often take in too little. To find the right spot, slide a piece of paper between the reed and the mouthpiece until it stops. That's where the reed starts touching the mouthpiece, and that's where your bottom lip should sit [3].
- The quick fix. If the sound is high and shrill, take a little less mouthpiece [2]. If you get only air, or a tiny weak sound, try a little more [1][4].
Step 3: The mouthpiece-and-barrel test
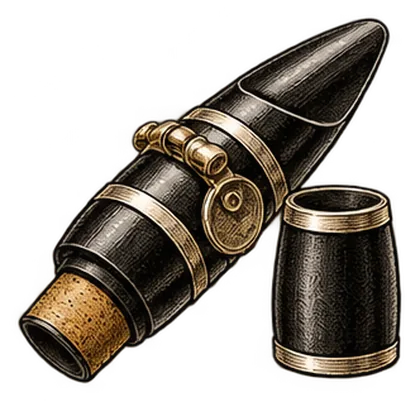
Before the whole clarinet, play on just the mouthpiece and barrel. D'Addario recommends this as a daily warm-up for beginners. When the embouchure, tongue position and air speed are all right, the mouthpiece and barrel together sound a concert F♯ [3].
Check it on the clarinet tuner. That tuner shows notes the way a clarinet player reads them, so concert F♯ appears as A♭, with "sounds concert F♯" on the line underneath. (Switch the tuner to concert pitch and it shows F♯.) If you're well under it, D'Addario's checklist points to the embouchure, the tongue position or the air speed [3].
Step 4: Hold the clarinet
Right thumb. It goes under the thumb rest on the back of the lower joint [2] and holds the clarinet up [1]. Don't slide the thumb too far under the rest. The right thumb should push up slightly so the mouthpiece stays wedged against your top teeth [5][4].
Left thumb. It covers the thumb hole on the back of the upper joint. Knight, writing in The Instrumentalist, says the thumb should point at about a 30 degree angle to the clarinet, like a clock hand pointing to one o'clock, rather than lying flat along the body or straight across it [5]. When the thumb is off the hole, it should hover just over it instead of resting on the wood [3].
Fingers. Cover the holes with the soft pads of your fingers and feel each hole sealed all the way around [4]. Keep the fingers arched, pointing slightly down and close to the clarinet when they're lifted [5].
Angle. Sit or stand up straight with relaxed shoulders, and hold the clarinet at about 45 degrees down from your body, not out in front of you [2].
Step 5: First notes
Start with the notes that take the fewest fingers.
| Note | Fingers | What to know |
|---|---|---|
| G4 | none (open G) | The note most bands tune to on clarinet. It sounds concert F [2] |
| F4 | left thumb on its hole | Sweetwater's first note on the whole clarinet [2] |
| E4 | thumb + left first finger | The first note of Hot Cross Buns |
| D4 | thumb + left first and second fingers | Keep the thumb hole fully covered |
| C4 | thumb + left first, second and third fingers | Hot Cross Buns ends here |
Each new note adds one finger on the left hand. The clarinet chart shows each fingering on a card that you can tap to hear the note.
Start each note with the tip of your tongue touching the reed. Yamaha's educator site suggests the syllable "da" for this [4].
Worked example: a 10-minute first session
- Minutes 0 to 2. Mouthpiece and barrel only. Play long, steady notes and check them on the tuner, aiming for concert F♯ [3].
- Minute 2 to 3. Put the clarinet together. Right thumb under the thumb rest, pushing up slightly [2][5].
- Minutes 3 to 4. Open G, nothing pressed, but keep your fingers hovering close to the holes [5]. If it comes out shrill, take a little less mouthpiece [2].
- Minutes 4 to 6. F with the left thumb [2]. Then E, adding the left first finger.
- Minutes 6 to 8. D, then C, adding one finger each time. Press each hole firmly with the finger pads and feel for the seal [4].
- Minutes 8 to 10. Play Hot Cross Buns. The site's clarinet version uses exactly E, D and C, so it's the three notes you just learned: thumb and one finger, thumb and two, thumb and three.
If a note squeaks, check the fingers before anything else. A hole that isn't completely covered is one of the most common causes [5][4], and the squeaks guide goes through the others.
When the sound won't come
- Only air. Often not enough mouthpiece, or lips not sealed all the way around [1][2].
- A thin, weak sound. D'Addario's trick for students who can't get a full sound: roll a swab into a ball, push it snugly into the bell, and play while trying to blow it out. Have someone pull the swab out while you're still playing, and the full sound should be there [3].
- Higher notes won't speak. Tightening the embouchure doesn't reliably fix it. Yamaha's educator site says the real problem is often how much mouthpiece you have or a reed that's too hard, so more air or more biting won't solve it [4].
- The note cuts out. Dropping the jaw to bend the pitch makes the note stop responding [4].
After the first session
Once C, D and E feel steady, the clarinet songs page has six more beginner tunes with the fingering under every note, and the clarinet chart has every note up to the top of the range. The big hurdle comes later, when you cross the break from the low notes to the high ones. On the chart, the C above the staff is the same fingering as low F plus the register key, and the guide to crossing the break is there for the week you get to it.
Common mistakes
- Biting the reed or sucking on it. Top teeth go on the mouthpiece [2].
- Puffing the cheeks [1].
- Holding the clarinet straight out. Aim for about 45 degrees down [2].
- Left thumb resting on the wood. Keep it hovering over the hole when it's not covering it [3].
- Fingers too far from the holes. Keep them close and arched [5].
- Flat fingers pressing against the keys [5].
- Right first finger tucked under the side key to hold the clarinet up. The right thumb holds the clarinet up [1].
- Collapsed wrists to balance the clarinet [5].
- Fingers that don't fully cover the holes. Small hands often have to work at sealing the right-hand ring-finger hole [4].
If your hands get tired from holding the clarinet up, Knight recommends a neck strap. It takes the weight off the right thumb [5].